

Turn on the waitlist
1
Open the event's settings
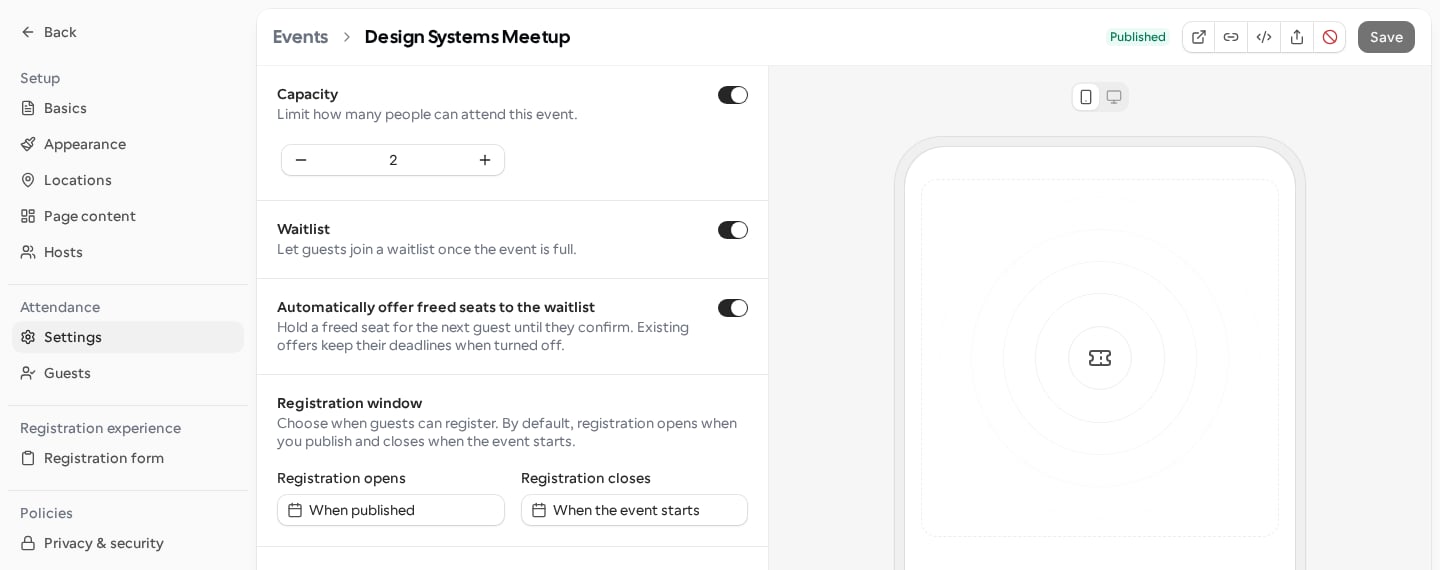
Go to Events, open the event, and select Attendance → Settings.
2
Set a capacity
Turn on Capacity and enter the number of spots. A waitlist needs a capacity limit.
3
Turn on the waitlist
Turn on Waitlist. Once the event is full, the event page shows Join waitlist instead of
Register.
4
Choose whether freed seats are offered automatically
On a free event, Automatically offer freed seats to the waitlist appears under Waitlist.
It’s on by default. Save the event.
How freed seats are offered
With Automatically offer freed seats to the waitlist on, a seat is offered when it frees up:- A host removes a guest who holds a seat
- A guest cancels their registration or changes their RSVP to not going
- A guest declines a held seat, or doesn’t confirm it in time
- You raise the event’s capacity, or the capacity of one of its locations
- If the guest confirms, they’re registered and get the usual confirmation email.
- If they decline, or the deadline passes, the seat is released and offered to the next guest in line. A guest whose offer expired gets an email saying the held seat was released.
Cal.com offers seats as they free up. Turning the setting on doesn’t offer seats that were already
free, so the next seat that frees up is the first one offered.
Locations with their own capacity
If any of the event’s locations has its own capacity, each location has its own queue. A seat that frees up at a location goes to the longest-waiting guest who chose that location, chose a location without a limit, or didn’t choose one. A guest waiting for a full location doesn’t hold up guests waiting for a location with room.Turn automatic offers off
Turn off Automatically offer freed seats to the waitlist to stop new offers. Seats that are already held keep their deadlines, and guests can still confirm or decline them. With the setting off, you move guests off the waitlist yourself from the Guests board. On a paid event the setting isn’t shown. Freed seats on a paid event’s waitlist are always offered automatically, and the guest is asked to pay instead of confirm.Confirm or decline a held seat
The link in the email or text opens the event page with a Confirm your spot button and an I can’t make it button. The guest doesn’t need to sign in.- Confirm your spot registers the guest and opens their registration on the event page.
- I can’t make it shows Your spot has been released. and offers the seat to the next guest.
- If the link has expired, was already used, or the guest is no longer waiting for this seat, the page shows This confirmation is unavailable. It may have expired or already been used.
Keep the link to yourself. Anyone who opens it can confirm or decline the held seat.
Your place on the waitlist
Guests on the waitlist see You’re #N on the waitlist on the event page, in the embed and on the registration confirmation.- Only the guest sees their own position: when signed in to Cal.com, or in the browser they joined the waitlist from. It isn’t shown in the public guest list, in emails, or to someone who opens a forwarded link.
- The position counts guests ahead of them who can take the same seat. When locations have their own capacity, guests waiting for a different full location aren’t counted.
- The position disappears once the guest is offered a seat or leaves the waitlist.
What hosts see
On the Guests board, a guest with a held seat shows Confirmation needed.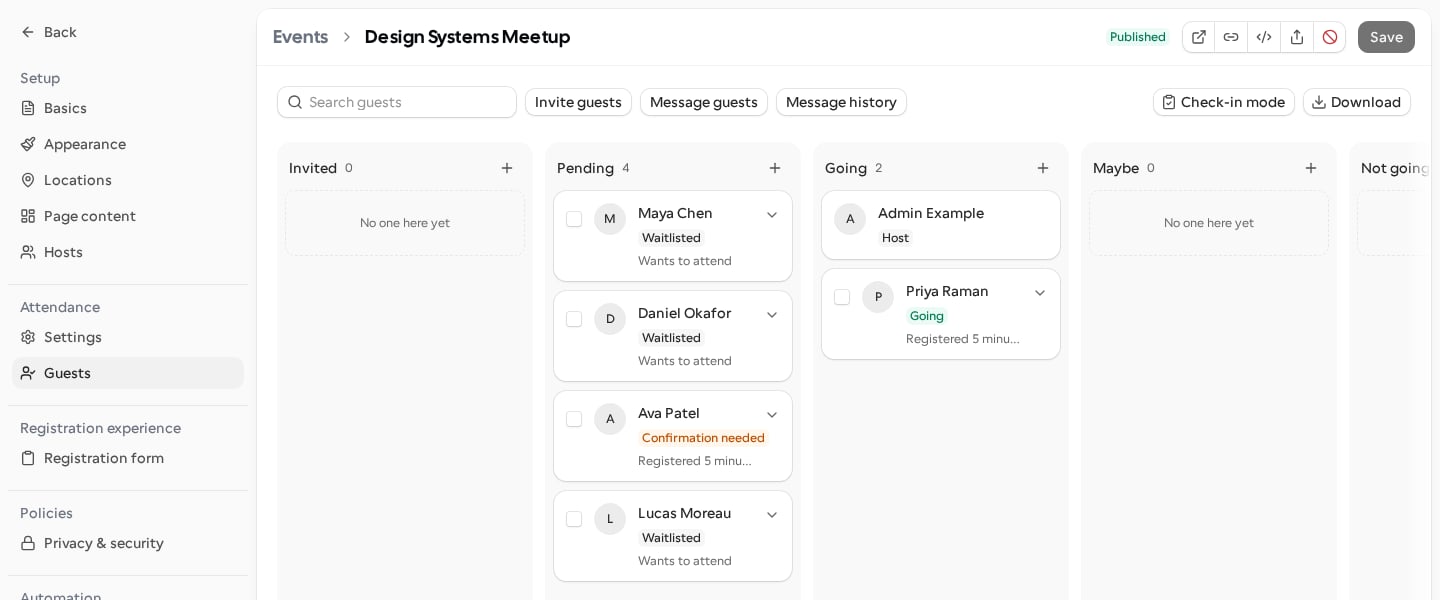
- Approve confirms the guest into the seat they’re holding, without using another seat.
- Remove cancels the hold. With automatic offers on, the seat is then offered to the next guest.
- Guests still on the waitlist keep Approve and Decline, so you can move someone off the waitlist yourself.
Waitlist settings in the API
Events created with API v2 have automatic offers turned on. UsewaitlistEnabled to turn the waitlist on or off.